Tag: MX5 NC (MK3)

  • New Towing Eye

    New Towing Eye

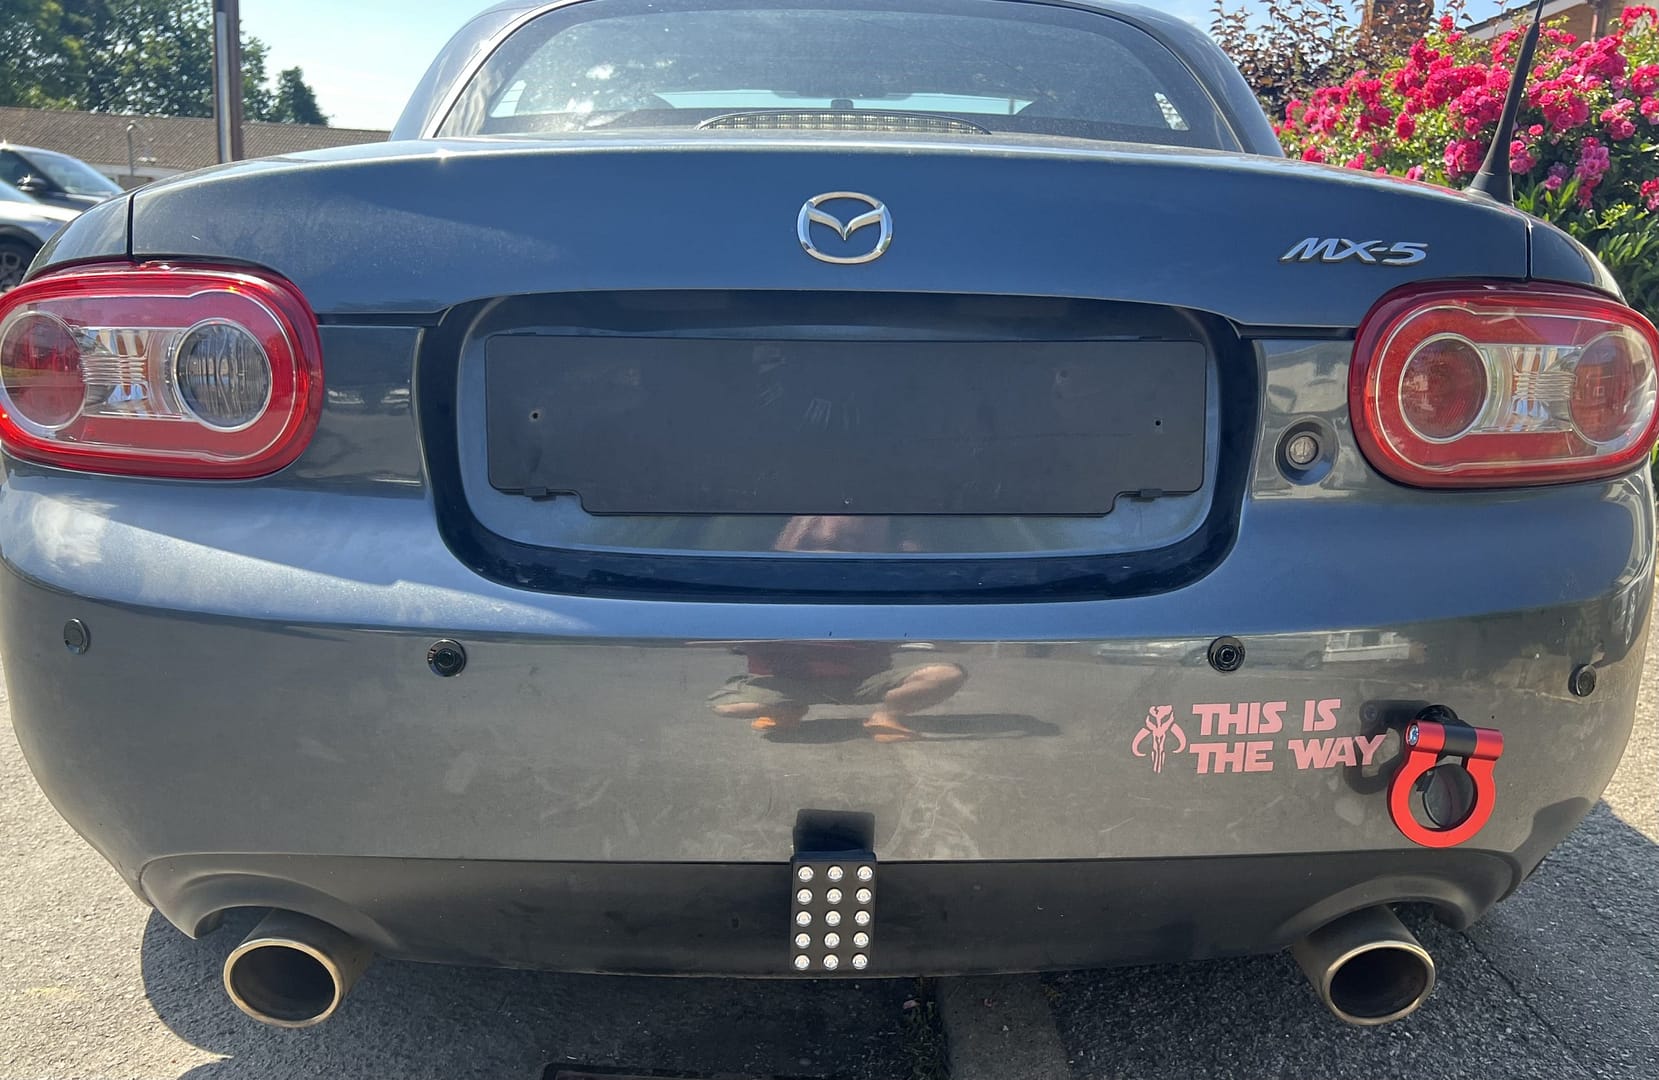
    I’ve always been concerned that the OEM towing eye was a hazard for pedestrians when I was not on track and also that removing it left access for water and created a rust trap – as with the rear one that I had to replace as it was corroded badly.

    So I decided to replace it with this one from Jass Performance. It screws straight in and looks better than the old one. £38 well spent.

    Im booked in now for Silverstone GP Circuit and Thruxton, so on with prepping the car.

    Dilema

    I’ve managed to break on of my keys when it literally fell apart on me and I’ve no transponder for a replacement.

    The question is whether to risk it or get another key. Apparently I need two working keys to programme a third.

    TBC

  • Nice new windscreen fitted, next the MoT

    So it’s been raining (again) and is therefore the perfect day for Autoglass to come and change the windscreen. I’d noticed a crack in the screen when I was fixing the water leak and it seemed long enough to cause concern about my upcoming MoT so it needed sorting out.

    The process was painless enough, book it in for a date, confirm and find its a different date to the one you wanted so change it and get something more convenient.

    They ping you by text to say they’ll be there sometime on the day you want then nearer the time they give you updates to say they are on their way.

    The lad who fitted it was friendly and got on with it under the really impressive awning/cover mounted on the roof of their van.

    Anyway it’s done, the screen looks beautiful and much cleaner than the old one. The instructions were something like don’t drive it for half an hour, don’t wash it for 24 hours, don’t worry about the rain that’s ok.

    Next up I’m going to book the MoT and then cross my fingers in the hope that I can then get the season underway and get it filthy again.

  • Number Plate Light Upgrade

    Number Plate Light Upgrade

    So there’s the little matter of an MoT test to prepare for. The number plate bulbs have always been an issue for me and the ones in the MX5 have been temperamental since I got it. So I decided to fit LED ones in the hope of adding reliability.

    Again they were bought from MX5 Parts, arrived promptly and were pretty simple to install, with just a simple slide to one side to remove the old units.

    popped the old unit out
    the buld housing connected
    view of old unit from behind
    the old plastic light holder
    old unit and new unit attached you can see difference in brightness
    Here you see the brightness comparison
    New units in place. That rust is playing on my mind
    Job done

    Fitted they worked immediately and without fuss. They seem much brighter than the the bulbs they replace. Time will tell about reliability but so far so good.

    Now that it’s completed I’m happy with the product, but that rust on the boot is a worry.

    I could treat it, but in truth I’m starting to think about,”… simplify and add lightness”, once the MoT is over.

  • Adjustable Runners for Drivers Seat Fitted

    Adjustable Runners for Drivers Seat Fitted

    Happy as I was with the seat position, I share the driving at track days with a person with less reach in her legs than me and so it was clear that for comfort and safety I would need to either move the seat manually at track days or fit a sliding runner.

    I decided that I would purchase a Cobra sliding runner as they were relatively cheap and logic said must fit properly.

    I tried fitting them direct to the base of my seat which was very easy but the runners themselves did not line up with the Barbarian subframe on one side as they were too narrow. As I also did not like the fully upright position I elected to re-fit the Cobra side mounts and mount these to the runners.

    I needed to measure and drill two holes into the Barbarian mount but the runners went in. Attempting to fit the slider crossbar I realised that the runners were mounted too narrow for the bar. Whilst they could be compelled to work with a flat head screwdriver this was not ideal.

    Sleeping on the problem I elected to bent the bar into the correct width. A couple of railway sleepers in my garden helped facilitate the adjustments required and after one or two attempts it fits and makes adjustment an easy task. It also helps when leaving the vehicle by removing the need to shimmy around the steering wheel, making for much more dignified egress.

    Heated leather seats are great
    they are comfortable for the road
    but sometimes
    something more is needed

    Anti-Submarining

    In the photos the red webbing is closed loop load restraints rated at four tonnes. I’ve installed these under the seat to act as points five and six and address the fear I had about this. At some point I’ll replace the harness but at the moment this is my best fix. I would not recommend this mod to readers as its safety is unclear and knowing what I know know I would have taken the hit and just bought a six point harness.

    3-Point Harness (Updated)

    I’ve fabricated an extension to the seatbelt stalk and bolted it to the seat base so now I have the option of a three point harness for every day and a full harness for track days.

    I will need to purchase a seat occupancy sensor by-pass in due course for the passenger seat so the remaining airbag can still deploy on that side of the vehicle.

    Since writing this I found that a seat occupancy sensor bypass for a Mk 3 is difficult to find and I will need to rely on the kindness of an MoT tester or put the old ones back in,

  • Track Day Seats, another rabbit hole (Part Two)

    Track Day Seats, another rabbit hole (Part Two)

    So it’s done

    Well they’re in (more or less). I looked at Tillett as my favourite choice but they were too expensive, then I looked at Corbeau, Cobra and Recaro.

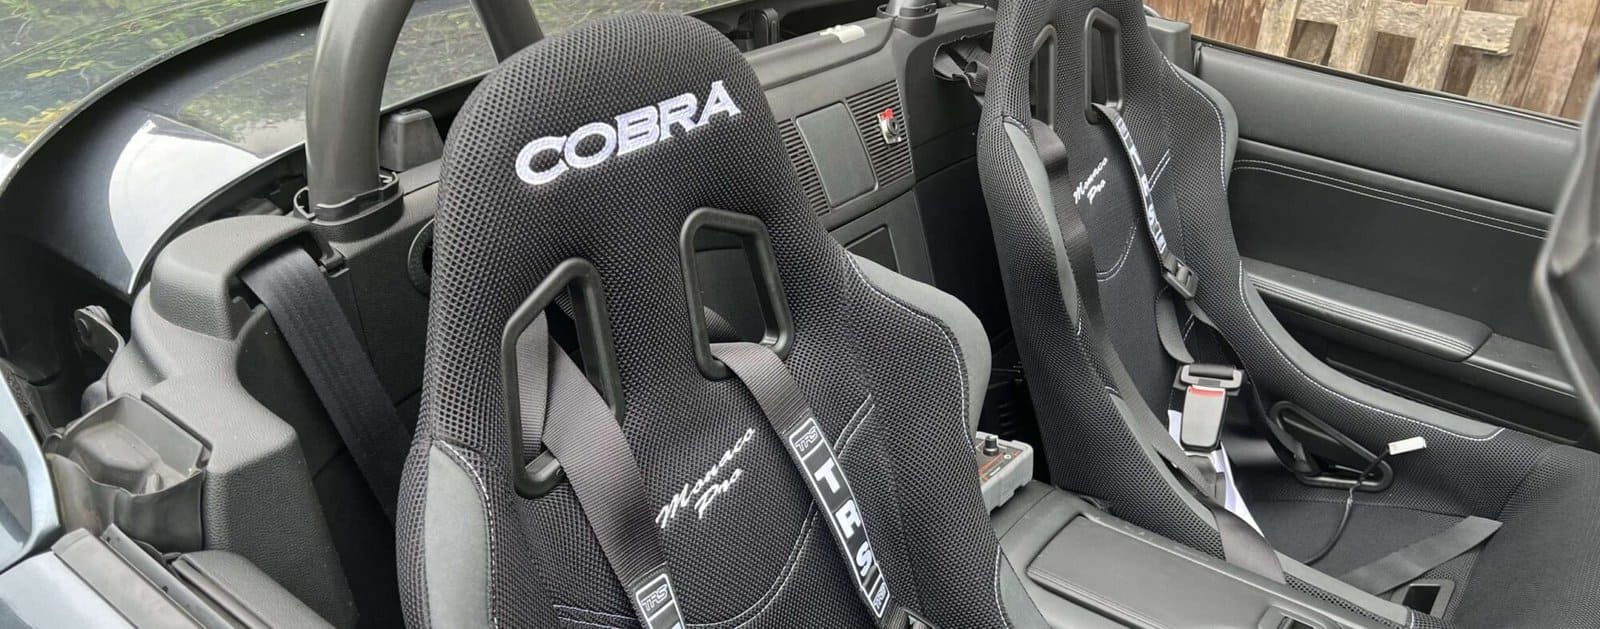
    I wanted GRP or Carbon but ended up with a steel frame, In the end I went for Cobra Monaco Pro’s with steel side mounts, I was unable to work out a solution quickly that would allow me to use the OEM sliders so bought some heavy Barbarian mounts.

    This allowed me to get the Cobra’s installed before another trip to Thruxton Circuit a few days later. I was compelled to do some frilling to get the seats mounted far enough forward.

    I’d elected to get TRS clubman harnesses as an entry into the harness game and these went in without too much hassle. though I was compelled to get some anchor points from Demon Tweaks which arrived promptly.

    Cobra Monaco Pro’s

    I like them, my 34in waist fits in them well enough without being too tight. They look fab but are heavier than the Tilletts and GRP seats I had been looking at. They remained comfortable both for the drive to Thruxton and a full track day there.

    TRS Clubman Harness

    Postbox in the plastic are to allow Harness to attach of Harness Bar of Roll Bar
    In this image I still need to roll the excess harness straps

    It’s a four-point harness father than the six I had wanted. They don’t have a sensor in them for your warning lights so Ive decided to keep the three point as well and extend the OEM seatbelt stalk to get it to the right height for use with the seat.

    I’m looking at a solution for addressing the five/six point option without buying a new harness this year.

    Cybul recommend cutting a post box cutout in the trim to allow a harness to attach to the bar. Drilling this out with a large wood drill bit saw shards of plastic flying everywhere making it a complete pain to clean afterwards. I’ve protected the harness by edging the post box with rubber trim. (see above).

    I had not allowed for how restrictive to movement these were in comparison to a three point harness. So much so that I can’t switch the GoPro on when harnessed in and when trying to look over your shoulder – probably another reason to keep the three point harness for street use.

    Trying it all at Thruxton I was super happy. A few tidy ups remain to be sorted out namely, the OEM harness, buckle mount, fit a passenger presence sensor bypass module, attempt a five point solution for the harness and finally try to find an option to re use the Mazda sliding seat brackets for other drivers.

    But all in all I’m very happy with the new gear.

  • What’s the plan?

    What’s the plan?

    The with the exception of a dying battery (easily replaced) a broken fog light and perished rubber boots for the shocks all appeared to be fine with the Mazda.

    What it needed was a track day to act as a shakedown test day and act as a start point for the development plan.

    Start a Notebook & Get a Haynes Manual

    As an oldskool solution I started a dedicated notebook to log my ideas and make notes and also got an online version of the Haynes Manual for my car as a reference manual for the work which would soon be following.

    Book a Track Day

    I booked a track day at Castle Combe Circuit to give me a solid date to work towards for both as proof of concept and shakedown of the car to help me decide what would need to be done and in what order.

    Once the booking was confirmed I had a few weeks to decide what would be done to prepare the car for its first track day.

    Upgrade the Brakes

    First-off would be new brake discs & pads. Before I ever consider speed improvements it seemed sensible to look at braking and handling of the car first. road handling was sound, track handling would reveal itself on the day, but I wanted a solid start-point for braking.

    Conventional wisdom is that the braking on an MX-5 is pretty good and a big brake kit is not the first thing you’ll need. Even braided hoses were not a priority item for a beginner. Standard discs were reportedly pretty good on the Mk3 MX-5 so I elected to fit new discs all round and upgrade the brake pads over standard.

    After a bit of research I elected to go with replacement standard disks and EBC Yellow Stuff pads. These were ordered from Euro Car Parts who had an offer on. They arrived quickly and were added to the car.

    As I was replacing the disks, pads and fluid I also elected to go with HEL Performance braided lines to round off the upgrade

    Road testing revealed a sticking calliper and from forums and videos I learned that excess lubricating grease can collect behind the sliding posts and prevent the calliper working properly. Cleaning out the excess grease and torquing everything up properly seemed to cure this issue.

    EBC Yellow Stuff pads sometimes get mixed reviews especially for excessive dust. I have nothing to measure them against, but I really like them in the MX-5, This set has lasted me five track days so far and to me the pads give good feel and predictability. I’ll be buying a replacement front set soon as a stock item for when they eventually give up. I’ve also recently added some black wheels so this hides the dust.

    I measure their thickness and that of the disk after each track day so I know I’ve a margin of safety each time they are used.

    Sort Out a Telemetry Solution

    Next I’s need some way of recording lap times and video so I downloaded RaceChrono Pro onto my Phone and learned how to use it.

    Check Coolant, Brake Fluid Level and Engine Oil Level

    All were within normal limits and had been done for the servicing of the car prior to me buying it. They would be replaced following shakedown testing.

    I bought small bottles of brake fluid and engine oil for the boot in case I needed to top these items up on the day.

      Check Tyre Pressures & New Puncture Repair Fluid

      The tyres on the car were virtually new Michelins and would be fine for the shake-down. I decided that I would be looking for 2 bar (Hot) as the maximum for the tyres on these tyres on the day.

      As the puncture repair fluid was three years out of date I replaced it. The OEM electric pump was checked and worked fine.

      So that was it we’re good to go….

      With all checks complete we were good to go and Castle Combe would be my first track day.

    1. Track Day Intercom Installed

      View of TRS Jacks with helmet cable visible
      Helmet Intercom Jacks

      We found the MX-5 NC to be a noisy place to be on a track day, especially with the top down and got fed up of shouting at each other when we are on track days. I decided to try a Zero Noise full face intercom system to see if we could make communication easier.

      We put together a rough installation to test the concept at Thruxton Circuit and found it worked really well but the original location (behind the seat headrests) was inconvenient and the new location seems much more convenient especially if a seat upgrade takes place.

      Whilst the unit can be powered by a 9v battery this one has been hard wired to a fuse box, and the wires are routed behind the plastics with automotive connectors so that the plastics can be removed in the future without having to cut the intercom cables.

      The jacks are located where the two speakers used to sit between the seats on the roll bar which had been removed when the radio was upgraded and provided an easily accessible installation point and is convenient for the helmet cable.

      We cut the jack plug off the amplifier cables and bought some surface mounted jack plugs for this installation.

      All in all this seems to be a worthwhile upgrade for an MX-5 track day car.

    2. Thruxton Circuit Track Day

      Introduction

      In this post I’m looking at what I’ve done to the car since Silverstone in June, preparing for a track day and what happened on it.

      Work on car since Silverstone

      It’s been an expensive few months. Sometime’s the plan just doesn’t come together and you need to dig yourself out of a hole of your own creation (like in rebuilding the front end) and at other times (like installing the roll bar) it runs like clockwork and you end up wondering what went wrong that you haven’t noticed!

      I’ll post on these upgrades as I go along.

      Brakes: Having left Silverstone with a knocking sound from the suspension on the drive home (review of Silverstone to follow), I found I’d lost a sliding pin from the front left brake caliber. This necessitated replacement so I bought a Bigg Red slider pin kit and all was well. I’m going to do a full brake service in the off-season.

      Laptop: Having also found our AiM Solo2 DL quite helpful, I bought a refurbished Windows 11 laptop to keep all the car and track day info together in one place.

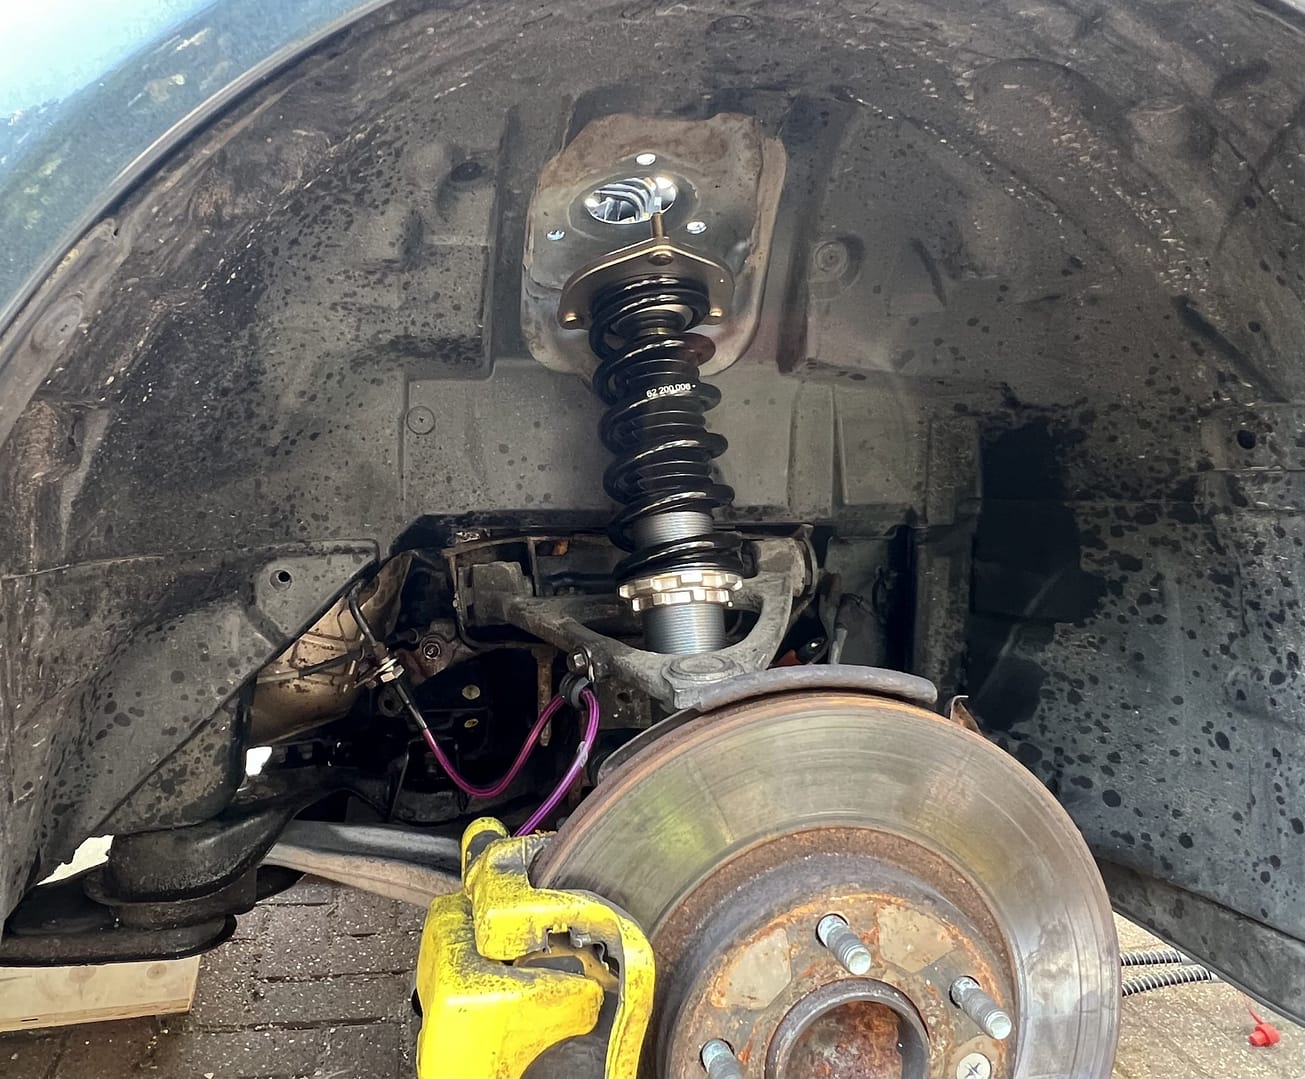
      New Lower Wishbones: As part of an attempt at a front suspension refurbishment which was meant to end with a full set of polybushed front suspension arms, I instead split an upper suspension arm pressing out the old rubber bushes; and then repeated the trick with the lower arm. So I bottled the remainder and replaced both lower arms with new replacements and the broken upper with a second hand replacement from a breakers yard (which was in better condition than the original). Obviously a story tbc….

      Front Alignment Bolts: In that refurb’ I’d also elected to replaced the alignment bolts as the originals no longer permitted any adjustment.

      Track rods replaced
      Missing Brake Slider Replaced
      Work underway in wheel arch
      Cracked upper wishbone
      new Alignment bolt
      Carnage with the seats removed
      guts hanging out prior to new roll bar going in.

      New Inner/Outer Track Control Arms: To replace completely seized originals.

      Front Roll Bar Bushes: Replaced with Poly – the only bit that worked so far.

      Track Day Alignment: I then took the car for a track day wheel alignment at a local tyre depot which will align them as close to the Bofi Racing Track Day recommendations as they can get. Not a cheap option when its all out of alignment, but so worth it.

      Car Intercom: I’ve also added a Zero Noise Valiant Intercom and their Full Face Helmet Intercom set to two helmets from Demon Tweeks – a brilliant addition that means we don’t need to shout at each other to communicate over the wind and engine noise.

      Extra Fusebox: I’d also added an extra fusebox to power a new intercom system and some planned additions in the future

      New tyre: I’d also needed to replace a road tyre which had picked up a screw and was unrepairable.

      Cybul Roll Bar: A safety upgrade purchased from Bofi Racing.

      Taken together even without the laptop this had been an expensive few months. I managed to bring it all together on the Sunday before the Tuesday track day. So then I could pre-flight the car for Thruxton.

      Track Day Preparation

      This will be my fifth track day and I’ve begun to develop a pre-flight check list to standardise my prep in the week before I go.

      I also carry a towing bar in the boot so I can be towed if I break down heading home from the track; and a petrol can, our helmets and food & drink for the day.

      Usually we go in convoy of two cars so we can carry the extra gear in that.

      On the Day

      For Thruxton I usually book with Javelin Trackdays as they allow overtaking on either side which I prefer on this track as it is very fast and the on-track discipline of other drivers is not always the best.

      Javelin allow a slow driver to indicate their intended line so a faster driver can pass on the remaining side. I’ve been black flagged before with another provider for pulling left to allow a much faster car to overtake on the right at this track before.

      For me this has worked well up to now as with closing speeds being quite fast with some cars, then moving-over is sometimes more instinctual than planned when the car is on the edge of grip.

      I’ll always use the turn indicators to tell people where I’m going so they can pass on the other side, its less safe when the following car “misjudges’ its braking or turning zone and ends up overtaking in the corners or in the chicane as happens more often than I like; but this happens with all providers.

      Also the afternoon session as anyone will tell you are way less congested than the morning as people start to head home early.

      Did the upgrades work?

      So lap times came down for both drivers as we were more confident in the corners. Terminal Speed was up for both of us and feel was much improved as we were able to judge grip and turn much better.

      As were using a slower less powerful car we were not lapping that fast (top speed 103mph) and were lapping at just over two minutes. Though as before each lap is compromised to some extent by the faster cars as you move off line or allow a car to let them pass you safely.

      For some reason the Solo2 DL did not record any data on this session which was a disappointment but we managed to recover some data using the GPS file of the GoPro when rendering using RaceRender3

      Here’s a video from YouTube of my best lap of the day

      youtube placeholder image

    3. Biblical Rain and a First Track Day at Castle Combe

      So we set off to Castle Combe the rain rolling in for the early morning drive to the track. Visibility was rubbish and we began wondering what we were letting ourselves in for.

      We made it to the track in half light and once registered we settled in for the wait as the rain rattled on the cars roof. The boredom was relieved by a trip to the scrutineering bay for the sound check.

      We passed with ease. The scrutineer told us that MX-5’s rarely fail the noise test and probably only when someone decided to fit a straight through exhaust with no silencers.

      The rain eased off a bit and we stood in the paddock for the drivers briefing then queued up for the sighting laps behind the pace car. Once those were completed we were on our own.

      Impressions of the Car

      On the drive in all seemed to be working well so I had no concerns.

      As the morning progressed and we began to drive harder I began to realise that the LSD wasn’t working properly as I had some wheel spin especially on the slipper paint of the chicanes at Castle Combe.

      We also had some problems (user error) with video so the session was recorded mostly as data with little video or gaps which we’d need to sort out.

      Finally Castle Combe in the wet was good fun but we were not pushing it at all. In the restart after lunch one car spun off and we bailed out and went home through flooded villages.

      The car had told us what we needed to know and we could develop a plan from there

      Here’s a video of my first very slow track day laps in the rain.

      youtube placeholder image
    Optimized by Optimole