Tag: Exhaust System Upgrades

  • MX5 Suspension & Exhaust Upgrades Begin

    MX5 Suspension & Exhaust Upgrades Begin

    Introduction

    May and June saw the process of preparing the car gathering pace ahead of planned trips to Silverstone and Thruxton circuits.

    Planned works included BC Racing DS coilovers in the corners, a sound-pipe delete and a new catted BBR GTI Exhaust System. Also plans included installation of adjustable seat runners on the passenger side and new EBC yellow stuff pads for the season ahead.

    BC Racing Coilovers

    Choosing the suspension has been the most stressful decision about the car so far. I wasn’t sure I even needed to upgrade and it was pretty good already with the Bilsteins which were standard on this spec of car.

    The choices I thought about were – should I stay with the Bilsteins’ or try something else; and if something else then what; should I run with the pack and fit Meisters or try something else like Yellow Speed Racing, Ohlins, or similar.

    At Thruxton I’d hit the bump stops at Campbell on more than one occasion last year when trying to conserve speed so this had made up my mind to try something new. I was looking for something firmer, and with 88k on the clock I thought the Bilsteins’ were probably past their peak.

    In the end, after much humming and harring I chose the BC Racing DS range as I wanted something that might be more plush for the road bumps and stiffer for the track day undulations. I elected to stay with the softer 6Kg/mm front 4 Kg/mm rear springs as BC racing had strongly suggested this starting point so I elected to run with it and upgrading springs if necessary in the future would not be that expensive.

    Installation

    I measured the ride height of the car (hub centre to top of wheel arch) prior to starting and decided that my target would be 245mm for the front and 250mm for the rear once the new suspension was installed.. This would give a little rake for loading and acceleration squat and I gambled that the stiffer springs would not squat so much with fuel and passengers on board, It will be easy to adjust the height once the car had settled onto its new suspension should this not be enough.

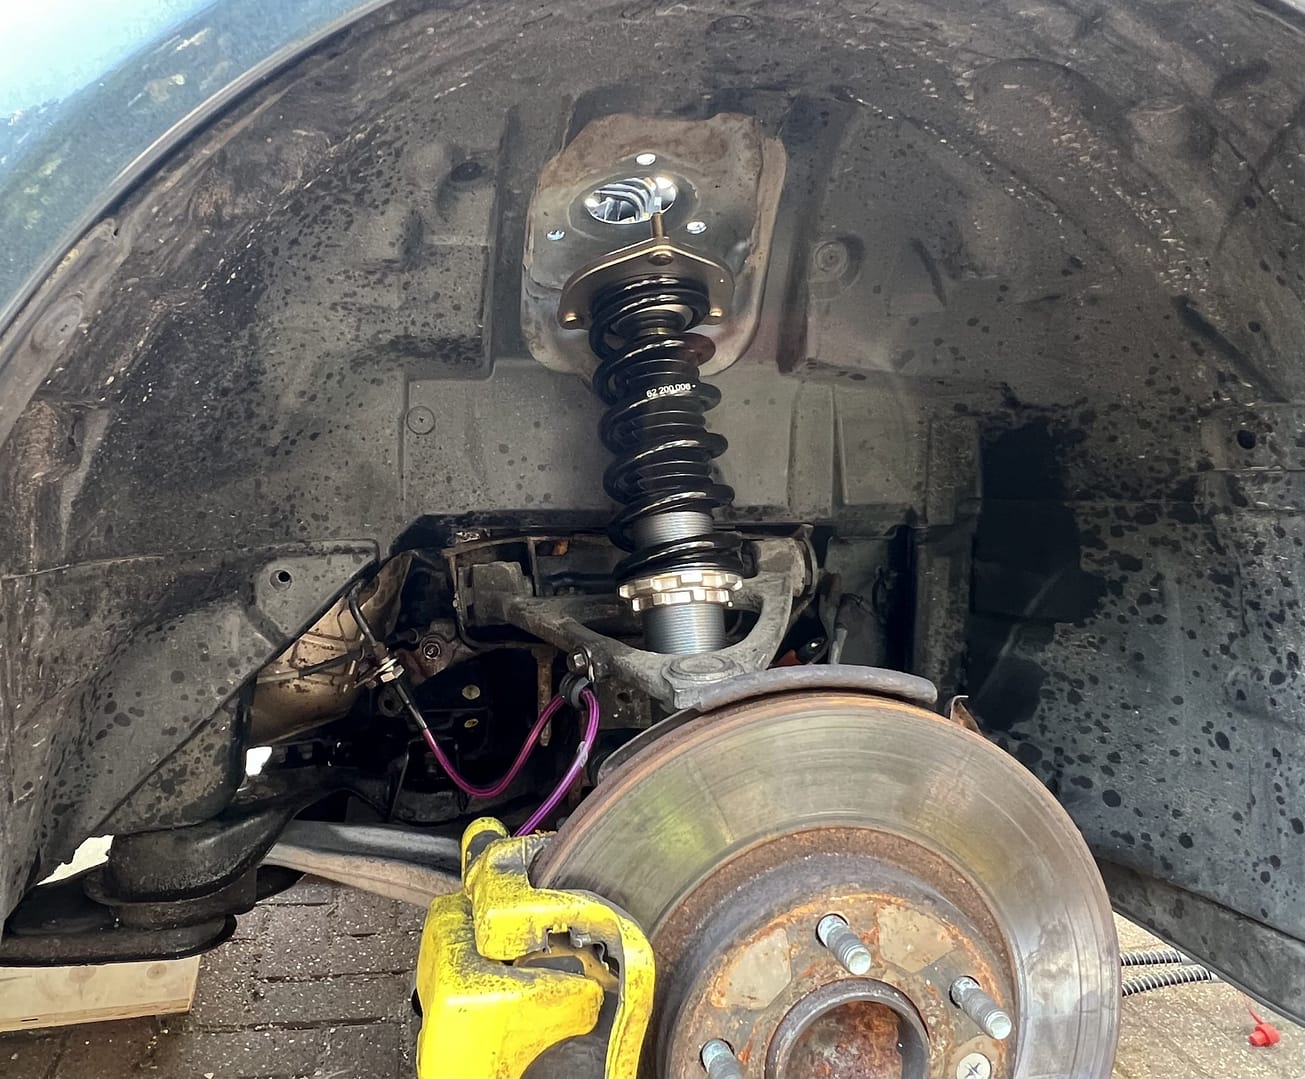
    I having jacked up the car. I removed the wheels then the bolts on the suspension upper mounts and also removed the turret brace bars. These bolts are not torqued up very much and were easy to remove.

    The front left was the first to succumb to change and took me a little longer than I had anticipated. I ended up accidentally disassembling the whole original shocker on the car having misunderstood what I was looking at when I was looking down at the top mount as the top of the Bilstein mount which had a black shiny metal cap was nearly the same colour as my car and looked like a permanent part of the car. having understood the issue the remaining mounts proved much easier to remove.

    I also removed suspension upper wish bone bolts, brake line fasteners, anti-roll bar and drop-links to allow for the necessary wiggle room and it all came out nicely. The only pig was the strut bottom nut and bolt which was super stiff and took plenty of work with a breaker bar to get out.

    To be fair the new struts are pretty boring to look at but are super clean and have no rust (unlike my rusty Bilsteins which had definitely seen better days).

    When refitting the top suspension mount brace to the BC’s I took the opportunity to drill the brace top and fit 11cm extenders to the front suspension adjusters and 25cm extenders to the rear. these facilitate rapid adjustment of rebound on track days. I wound it all up to 5 clicks off max hardness all round for the test period

    The sound pipe has been deleted and a Mk3.1 air pipe replaced the original. Also the suspension adjustment is blocked by strut brace
    Sound Pipe Delete and new suspension fitted

    New Exhaust System

    Whilst the car was up on the jacks I took the opportunity to instal a new exhaust. This was a the BBR GTI catted manifold, mid section and Grand Touring exhaust. Removing the old manifold was the most trickiest operation with rusted in bolts catching on the body work despite angling the engine over on one side as seen in the Turbo installation YouTube video from Flying Miata.

    The purchase of some swan neck ring spanners proved very useful in both the removal and installation phases for managing the manifold bolts.

    I also gave some thought to he absence of heat shields on the BBR manifold and fitted some gold reflective tape to the pipes and cam cover and existing engine bay shield and fabricated a shield for the back of the alternator where there appears to be a black plastic air duct.

    Heat shielding over new exhaust, also suspension adjustment extenders fix the problem of fouling caused by strut brace.
    Heat shielding and suspension adjustment extenders.

    Versatune

    Also while I was at it I opted to remap the ECU by flashing it with a vesatune basic upgrade.

    Impression

    So the weird thing is that the suspension feels a little stiffer but not massively different at urban speeds. The engine note is exactly what I wanted with a little burble and more open bark under acceleration and is not any more intrusive at motorway speeds than OEM.

    I had dialled the suspension up to five clicks from hardest all round and have noticed that under hard acceleration there is now some kick in the straight line direction upon gear change and I think this may be because as yet I have not had the tracking re-set. though it may also be chasis flex, but tracking will be the first step.

    Anyway despite this anomaly it was more or less ready for Silvestone and Thruxton and the seat runners would have to wait for another day…..

Optimized by Optimole