Category: Uncategorized

These posts are for things other than car development and tracks.

  • Brace Yerself

    I’ve just put an order in for an IL motorsports X Brace and a Rear Lower Suspension Brace; to bolster chassis rigidity. More to follow in due course.

  • Wet Too At Thruxton

    Wet Too At Thruxton

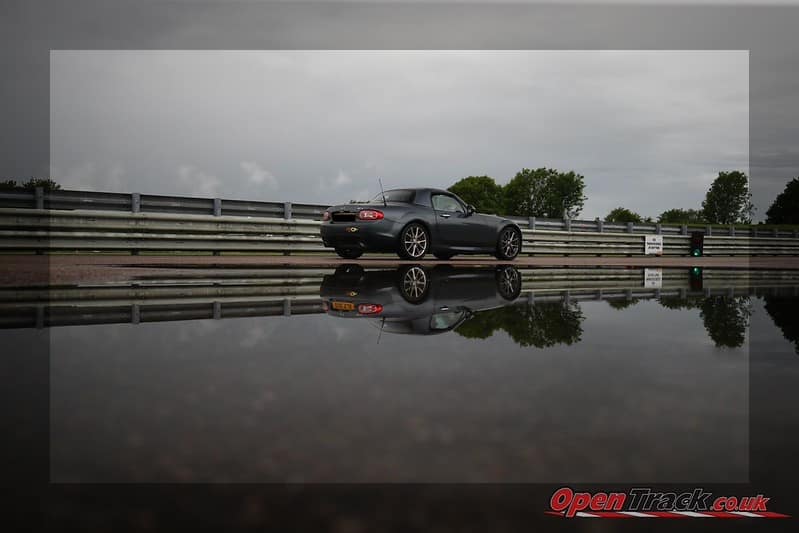
    In the last post we were at Silverstone for a very wet track day. A week later and we found ourselves at Thruxton and again it was a very wet morning session.

    Again the prep involved Road tyres for the same rsafety eason as before. This time we took a support car with us and loaded tools, picnic table, trolley jack water and a jet boil.

    The session was being run by OpenTrack and the day before I’d completed the online driver information video and brief factual test.

    After registration in the main reception it was over to the sound check.

    Exhaust Noise Check

    The noise check is held in the track’s Parc Ferme Area. The limit at Thruxton is 90dBA static at 3/4 of max revs. With the BBR exhaust this was clocked at 81dBA interestingly down from the 84 on the previous exhaust.

    Then it was over to the restaurant for the drivers briefing then back to the Paddock to set the gear up for the day. We’d taken care to not park in puddles of which there were a few.

    Sighting Laps

    The weather delayed the sighting laps by half an hour or so due to standing water on the track. I elected to run the first and second sets of sighting laps to warm the car up and get a feel for the track.

    Then it was back to the paddock and a quick check of suspension Softest +5 clicks and tyre pressures 1.8 bar. before heading back out.

    Pit Lane Access

    From the Paddock the Thruxton pit lane used to be accessed through the topmost garage which was always a test of nerve.This has now been removed and is now slightly less of a concern to drive through and has improved visibility.

    The End garage has been removed red since my last visit which makes access to the track pit lane easier

    This is just as well as with a full harness and HANS device on the helmet left-right visibility was limited.

    Game On

    We got laps in despite the changeable conditions.

    At Thruxton due to the layout of the track we had not so many traction control issues as at Silverstone, and again no aquaplaning. So I can heartily recommend by Dunlop Sport Maxx’s as a wet choice.

    In The Afternoon The Rain Stopped (Mostly)

    Heading out onto the track at Thruxton

    As the track dried out times improved and confidence in the conditions increased.

    In the lunch break we’d talked to several other Mk3 MX5 drivers, there was a beautiful blue Mk3 which had the full normally aspirated conversion with ITB’s which sounded great and went like a rocket past us on several laps.

    This shared the same BBR manifold, mid-section and silencer options as my car and was a great advert for the upgrade and did nothing to undermine the potential as an option for future development on my car.

    Having a wail of a time was also the driver of a lovely metallic red standard MK3 Sport which had been using Uniroyal Rainsport 5’s to good effect in the rain and Avon ZZR’s in the drier conditions; flying around Thruxton scarily fast.

    This was as good an example of what can be achieved by a standard Mk3 MX5 driven with confidence as any I’ve seen; and a good indication of the distance I still have to go on my own journey to find an extra 15mph down the back sections of the track.

    We were offered a passenger seat but frankly I was too scared to take him up on the offer.

    I’ll be back at Thruxton soon. Hopefully the weather will be better.

  • Wet One at Silverstone Track Day

    Wet One at Silverstone Track Day

    Last June (2025), Silverstone was hot and sunny, we took a support car loaded with tools, tyres, gazebo and picnic table; and iit was glorious.

    This year the June track day was cold, breezy and rainy, though to be fair it settled down after 14.00 and the sun made an appearance, but what ever the weather a track day at Silverstone is such fun.

    It’s an expensive venue so it’s a once a year treat for me. This year the weather forecast was bad enough for me to cancel the support car because sitting in a car for much of the day gazing at the rain and being bored while I was out on track having fun was not something I wanted to inflict on anyone.

    Tyre Choice

    My Yokohama AD08’s were swapped for my SportMax road tyres in the rain the day before as they’d be no use in the expected heavy thundery rain.

    An early morning start on the motorway saw mixed conditions and I stopped at the services on the A43 at Brackley and took the opportunity to top up the petrol can with Super Unleaded and then a short final leg to the track and registration at the old pit lane.

    Setting Up

    The rest of the pit area
    My Pit

    I arrived at the track at about 7.30 and the gate and parked near the Cafe. I registered and got all the info want back to my car and pulled all the gear I’d crammed into it out.

    Two tool boxes, torque wrench, and a dry box for my food and drinks. I pulled my tow bar out of the boot and packed by helmet and HANS bags into the waterproof box.

    I placed the gear in front of the car so my Pit Box was clear to anyone who might be tempted to block it when I’m out on track. This has happened to me before at Castle Combe and is particularly irritating especially when your gear is in full view of them. I now reverse park and go no further back than the line for this reason.

    The Paddock
    The Padock, Drive up to the big truck and turn left into the pit lane.

    Some cars pulled in beside me and they arranged their cars specifically for this reason, telling me they have had similar experiences.

    Car Prepration

    Having experienced a bit of torque twitchiness on the motorway I backed the rebound on the suspension to +5 (five clicks from softest) with a plan to adjust as I went along and then also reduced tyre pressures to 1.8 bar (cold-ish)all round ready for the rain.

    suspension adjustment made easy with extenders all round
    Dial to max soft then +5 clicks

    Once round all the wheel nuts with a torque to check they were all firmly at 100nm and I was ready for the briefing and sighting laps.

    Briefing

    The Briefing was well attended with an explanation of the format of the day, the flags in use, when we stop for lunch, rules for overtaking, then it was back to the car to kill time until the sighting laps.

    Game On

    A wet track

    The sighting laps started at the usual pace and speeded up. After that the track opens and we’re on our own.

    Silverstone in the rain paddock side is bleak, track side however is much more entertaining.

    I followed the usual pattern of trying to get some heat into the brakes and tyres and building up speed as the laps tick by. I managed to get between 80 and 90 mph down the Hamilton straight, 90 to 106 down Hanger and 80 to 100 depending on the intensity of the rain and whether I was giving way to faster cars or not. Never once did the car feel like it was aquaplaning on the straights or braking in straight lines.

    Turning however was another matter several times I underbaked and the Traction control pulled it all back together.Appart from the trying the tarmac run-off between ?? Maggotts and Becketts, and going all wheels over the line at The Loop which is very slow and for which the car was off line due to the traction control being unhappy that I was pushing the cornering forces much harder.

    Given the weather I elected to put in more laps each time I was out (uptown blocks of 10 laps) and this help build a better picture of the conditions and the available grip.

    There were some really nice episodes where I had an open track to play with. On others I was forced to pull over on the right side of the track to let faster cars past. In the rain this can create a worry effect where there is vision at the sides of the track but a grey hole in your vision where you know the cars should be but you can see nothing but grey water as they speed past you (especially at the end of the Hanger straight).

    After the lunch break things began to dry out and I was able to get the roof down on occasion.

    Thoughts on the Day

    Despite the weather I found nothing to put me off Silverstone in the rain though I prefer the dry conditions for grip.

    I used the petrol pumps at the circuit rather than drive to Brackley on this occasion as I was shocked to find at the lunch break to find I had been racking up the laps and was down to less than a quarter of a tank. MPG for the car had dropped from 37 to 22 with enthusiastic driving on the track and across he whole day (including travelling to and from the circuit) I used nearly two tanks of Super Unleaded.

    In the wet conditions the tyres remained pretty intact with none of the heavy wear and melted rubber from the previous year evident.

    The brakes (EBC Yellow Stuff on normal discs) were again superb.

    The new suspension was excellent and I ended up settling at +7 clicks.

    Given the rain and some visibility issues Ive decided to buy a flashing rain light as a safety measure for similar conditions.

    Hopefully I’ll be back next year.

  • Steering Wheel

    Steering Wheel

    Choices

    I’ve been flirting with a number of ideas about the steering wheel in my car. The high sides and front lip of to Cobra’s made getting in an out of the car a little awkward.

    At first I thought I might try a removable wheel. I spoke to a mechanic about this who told me that as long as there is no indicator light flashing at an MoT test there would not be an issue for them if I fitted a removable steering wheel which did not have an integral air bag. However as a cautious soul I could not bring myself to test this assertion; and also worried about transferring the wheel mounted functionality or what would happen if I stumbled across a more conscientious tester or needed to make an insurance claim.

    I then looked at a wheel upgrades and settled upon Cipher or one from Royal Steering Wheels near Aylesbury. In the end the fitting service won me over and I placed an order.

    Fitting

    Having made an appointment I drove up to Stoke Mandeville and the wheel was fitted to the car in the car-park there. A similar wheel is prepped ahead of the fitting date and your old one is exchanged once the on-wheel controls, airbag and horn push are transferred over to your new wheel.

    I opted for a flattened bottom steering wheel with smooth and perforated leather and a grey centre marker with grey stitching to match the trim of the car.

    Raj was explained each step and how to look after the wheel.

    It takes just over 30 minutes to fit the wheel and on the day the appointment was a little late due to issues with the previous car.

    First Impressions

    I like it, it is thicker, feels very nice to the touch and is more comfortable to use than the original. Strangely it feels a little smaller. All the functions continue to work without fuss and gives a more up-market feel.

    I would recommend it as an option for MX-5 NC owners not looking to save weight.

    Read more: Steering Wheel
  • It’s sprung a leak (2) – Plugged it.

    It’s sprung a leak (2) – Plugged it.

    So I’d noticed the footwell carpet was wet and there was a damp musky smell in the car. I pretty much knew what this would be as my previous MX-5 had a similar problem when the drainage channels under the soft top clogged up. The other well known fault was the plastic holders for the screws which secure the panel under the windscreen and this is what my leak turned out to be.

    I’d researched the solutions – here’s a link to Completely Driven which is one of the many resources on YouTube I use to think about how to go at fixing the (any) problem with the car.

    Here’s a link to YouTube…

    I’d ordered parts from MX-5 Parts, these are push-fit rectangular clips with a waterproof seal, The OEM ones go brittle over time and the seal breaks allowing rainwater into the footwell.

    An OEM windscreen scuttle mount

    I’d ordered the parts from MX5 Parts and they’d arrived in good time I’d also ordered replacement cover which are said to have a tendency to be brittle and break when removed. Mine were fine but I replaced them anyway and so now have the old ones for back-up.

    The circular cover is reportedly brittle and MX% parts recommend replacement. Mine were fine.

    Once the cover (see image above) is removed there is a cross head screw to be removed and then the process of removing the windscreen wipers can begin (14mm Ring Spanner). Resist the temptation to clean the windscreen – the marks will help you position the wipers correctly when you are ready to replace them.

    The two part scuttle can then be separated from the body of the car by undoing a few clips. I found I didn’t need to disconnect any water tubes or rubber seals.

    The grubby state of things under the scuttle needed cleaning. during this process it was easy to notice how loose the screw mount was and easy to see how water could leak past it. Both sides of mine where in need of replacing and I’d already decided to replace both rather than have the faff of doing it again in a year or so.

    Removing wiper bolt cover
    Loosening the wiper bolt prior to removal
    Cleaning the area
    Removing the screw holder
    if you look closely I've added a biological security tag to the vehicle. Fortunately my tetanus jabs are up to date.
    Almost ready for replacement
    Bits under the scuttle
    What’s under the scuttle

    The new parts just pop into the hole and spring clip into place. I doubled-down by adding bathroom sealant around the edges and top of the new part.

    As a heads up the rubber seal at the head of the scuttle is held in place by a some white plastic T shaped clips and the scuttle front also has some plastic clips to clip it into place. So If it doesn’t fit then it’s probably out of alignment and that’s where to look.

    Putting it all back to together was the reverse off taking it apart.

    Im pleased to say it all went back together pretty easily and after more heavy rain the carpets are still dry so I’m quite pleased.

    The bad news is that when I was down feeling the carpet I noticed there a crack in windscreen from a stone chip so that will need doing before the MoT.

  • It’s sprung a leak (1)

    It’s sprung a leak (1)

    Given the recent monsoon-like conditions, it seems the Mazda has sprung a leak. This is not uncommon and happened in my first MX5. There are some fittings that give up under the windscreen on the weather side which will need some bathroom sealant.

    I noticed it looked pretty steamed up, then when I got in it had a damp smell to it. Pic’s to follow once it stops raining and I can dry it out.

  • Castle Combe Track Day – Great Fun

    Castle Combe Track Day – Great Fun

    I’d been putting off a return visit to Castle Combe Circuit because it was in excess of ÂŁ200, but I spotted that OpenTrack were doing it for a much better price in October and so jumped to sign up.

    I was last at this track about a year ago when we abandoned the day due to the heavy rain that day so I was cautious about what the car would be shod with; and was mindful that I’d be using the car to get to and from the venue as well as on the track.

    Preparation

    As the weather was awful in the week running up to the track day I elected to streamline the usual wheels-off preparation and between rain storms checked the tyre pressures, oil level, coolant level, brake fluid level and wheel torque settings properly.

    I’m pleased to say the oil level is lovely and stable in this car and oil burning is not yet a problem.

    I did a visual check for gearbox and diff oil leaks – both negative; and also for break pad depth and disc brake condition.

    In the winter break I’ll be replacing the fluids and toying with the addition of oil pressure and temp sensing, but as all was well no changes where required.

    Tyre Choice

    The run-up was fraught with weather-watching and trying to decide whether I’d be using the Yokohama AD08’s if it was dry or my standard road tyres if it was wet. The BBC’s forecast changed its opinion throughout the preceding week. I committed to the Yokohamas as late on the day before as I dared and fortunately found myself heading to Wiltshire on a beautiful autumn morning.

    It had rained the night before and so I was aware that I’d be carefully warming the tyres up before any pushing as they are allegedly not the strongest wet weather performance tyres.

    With that in mind I’m happy to report that they were superb around this track on a broadly dry day.

    Registration and Sighting Laps

    I’d timed my arrival for between 08.00 and 08.30 and found many had arrived earlier but I still found a place to park and put the gear I take with me out on level ground.

    Registration passed without problem but it was clear that you need to complete your online registration, video safety briefing and exam the day before (via your opentrack account).

    With my sticker on the car and wrist tag it was off to the scrutineering bay for the noise test. Its an MX5 so no problem there.

    A verbal briefing with the organiser and chief marshal and we were good to go: 12 cars on the track at any one time, Indicate & Pull Right to be overtaken on the left only, Overtaking on on straights, not in corners or braking zones, stay off the kerbs or we’ll be black-flagged if we do it too often, Spin and In, Spin on the sighting laps and your going home.

    We were sent away by being told that in the previous week a trackway had been cancelled at 10.30am due to a car spilling enough oil on the track for the track team to be unable to clean it up!

    Waiting

    Sighting laps completed, I waited a bit to let the queue go down and drove round to the pit entry and was treated with a 10 minute wait for access to the track. This was a feature of the whole day and not helped by people going off and red-flagging the session.

    When I buy track day insurance my insurer rates Castle Combe (and Thruxton; as well as others) as high-risk tracks and certainly there were several red flags across the day.

    The Plan

    As relatively new to the track day game, my plan involves spending the first lap to warm the tyres and brakes up, going a little faster in the second and then pushing-on incrementally from there each time I enter the circuit.

    The video below shows my fastest laps at the end of the day.

    Castle Combe Best of Day
  • Track Day Seats, another rabbit hole (Part Two)

    Track Day Seats, another rabbit hole (Part Two)

    So it’s done

    Well they’re in (more or less). I looked at Tillett as my favourite choice but they were too expensive, then I looked at Corbeau, Cobra and Recaro.

    I wanted GRP or Carbon but ended up with a steel frame, In the end I went for Cobra Monaco Pro’s with steel side mounts, I was unable to work out a solution quickly that would allow me to use the OEM sliders so bought some heavy Barbarian mounts.

    This allowed me to get the Cobra’s installed before another trip to Thruxton Circuit a few days later. I was compelled to do some frilling to get the seats mounted far enough forward.

    I’d elected to get TRS clubman harnesses as an entry into the harness game and these went in without too much hassle. though I was compelled to get some anchor points from Demon Tweaks which arrived promptly.

    Cobra Monaco Pro’s

    I like them, my 34in waist fits in them well enough without being too tight. They look fab but are heavier than the Tilletts and GRP seats I had been looking at. They remained comfortable both for the drive to Thruxton and a full track day there.

    TRS Clubman Harness

    Postbox in the plastic are to allow Harness to attach of Harness Bar of Roll Bar
    In this image I still need to roll the excess harness straps

    It’s a four-point harness father than the six I had wanted. They don’t have a sensor in them for your warning lights so Ive decided to keep the three point as well and extend the OEM seatbelt stalk to get it to the right height for use with the seat.

    I’m looking at a solution for addressing the five/six point option without buying a new harness this year.

    Cybul recommend cutting a post box cutout in the trim to allow a harness to attach to the bar. Drilling this out with a large wood drill bit saw shards of plastic flying everywhere making it a complete pain to clean afterwards. I’ve protected the harness by edging the post box with rubber trim. (see above).

    I had not allowed for how restrictive to movement these were in comparison to a three point harness. So much so that I can’t switch the GoPro on when harnessed in and when trying to look over your shoulder – probably another reason to keep the three point harness for street use.

    Trying it all at Thruxton I was super happy. A few tidy ups remain to be sorted out namely, the OEM harness, buckle mount, fit a passenger presence sensor bypass module, attempt a five point solution for the harness and finally try to find an option to re use the Mazda sliding seat brackets for other drivers.

    But all in all I’m very happy with the new gear.

Optimized by Optimole