Month: June 2026

  • Wet Too At Thruxton

    Wet Too At Thruxton

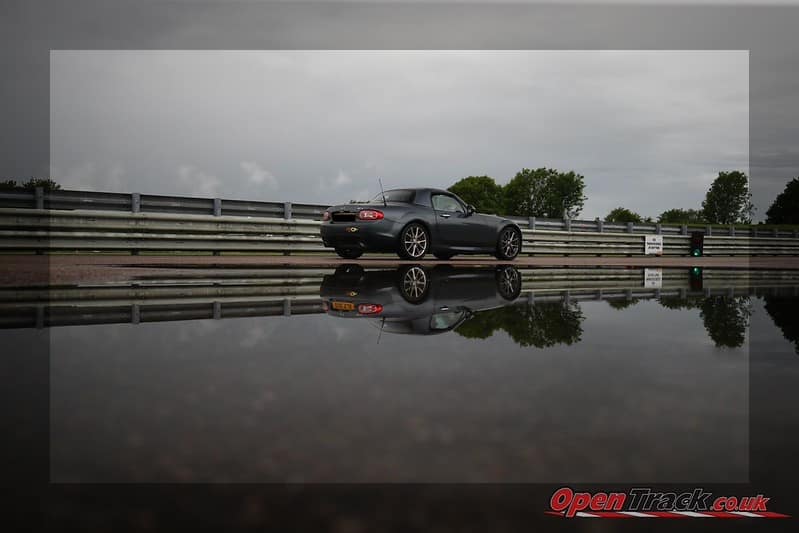
    In the last post we were at Silverstone for a very wet track day. A week later and we found ourselves at Thruxton and again it was a very wet morning session.

    Again the prep involved Road tyres for the same rsafety eason as before. This time we took a support car with us and loaded tools, picnic table, trolley jack water and a jet boil.

    The session was being run by OpenTrack and the day before I’d completed the online driver information video and brief factual test.

    After registration in the main reception it was over to the sound check.

    Exhaust Noise Check

    The noise check is held in the track’s Parc Ferme Area. The limit at Thruxton is 90dBA static at 3/4 of max revs. With the BBR exhaust this was clocked at 81dBA interestingly down from the 84 on the previous exhaust.

    Then it was over to the restaurant for the drivers briefing then back to the Paddock to set the gear up for the day. We’d taken care to not park in puddles of which there were a few.

    Sighting Laps

    The weather delayed the sighting laps by half an hour or so due to standing water on the track. I elected to run the first and second sets of sighting laps to warm the car up and get a feel for the track.

    Then it was back to the paddock and a quick check of suspension Softest +5 clicks and tyre pressures 1.8 bar. before heading back out.

    Pit Lane Access

    From the Paddock the Thruxton pit lane used to be accessed through the topmost garage which was always a test of nerve.This has now been removed and is now slightly less of a concern to drive through and has improved visibility.

    The End garage has been removed red since my last visit which makes access to the track pit lane easier

    This is just as well as with a full harness and HANS device on the helmet left-right visibility was limited.

    Game On

    We got laps in despite the changeable conditions.

    At Thruxton due to the layout of the track we had not so many traction control issues as at Silverstone, and again no aquaplaning. So I can heartily recommend by Dunlop Sport Maxx’s as a wet choice.

    In The Afternoon The Rain Stopped (Mostly)

    Heading out onto the track at Thruxton

    As the track dried out times improved and confidence in the conditions increased.

    In the lunch break we’d talked to several other Mk3 MX5 drivers, there was a beautiful blue Mk3 which had the full normally aspirated conversion with ITB’s which sounded great and went like a rocket past us on several laps.

    This shared the same BBR manifold, mid-section and silencer options as my car and was a great advert for the upgrade and did nothing to undermine the potential as an option for future development on my car.

    Having a wail of a time was also the driver of a lovely metallic red standard MK3 Sport which had been using Uniroyal Rainsport 5’s to good effect in the rain and Avon ZZR’s in the drier conditions; flying around Thruxton scarily fast.

    This was as good an example of what can be achieved by a standard Mk3 MX5 driven with confidence as any I’ve seen; and a good indication of the distance I still have to go on my own journey to find an extra 15mph down the back sections of the track.

    We were offered a passenger seat but frankly I was too scared to take him up on the offer.

    I’ll be back at Thruxton soon. Hopefully the weather will be better.

  • Rain-Ready Now

    Rain-Ready Now

    After the biblically wet track days at Silverstone and Thruxton recently, I decided to take the hint and get a rain light. Of course it’s not as simple as, “Lets buy a rain light”, you then need to navigate the options.

    Choice 1: I decided that I wanted an FIA approved one so that it was of a modern standard and not just something cheap which may or may be of use. So I bought something that was compliant with the FIA’s 2019 reg’s (yes I know I’m not competing – but being compliant with current race regs reassures me it will be track relevant).

    Choice 2: Round or Rectangular? I opted for rectangular merely as I liked the link of it more.

    Choice 3: Flashing or Constant? I read that flashing rain lights are easier to see than constantly illuminated ones when you are following from behind. In my Silverstone Post I talk about cars passing and nothing being visible behind the cars but grey water; so anything to improve my on-track safety drove me towards a flashing rain light.

    Choice 4: Flashing, Flashing and Brake Light or choice of Flashing with constant via switch; I chose to wire it as brake Light repeater with a switch operated flashing function. Obviously I don’t need to be completion class rules compliant which would have limited my options .

    £150+ later I was the proud owner of the CarTek 8874-2019 Rectangular Model Rain Light.

    FIA Flashing Rain Light from CarTek

    Instalation

    The three wires were expended with soldered wires and heat shrink and then I extended the heat shrink to to a length that takes the protection well under the car.

    As I was rooting around in the boot I noticed a large rubber grommet which gave me an entry point for the wires. Once the wires were brought up into the boot I found an earth point near the rear lights and then tapped the red wire into the brake light loom. The final blue wire which is the feed for the flashing function was fed through behind the seats and into the cabin under the centre console and the onto the designated switch.

    I’ve removed the panel below the radio which usually houses the lighter, aux audio input point and heated seat switches a while ago and eBayed the same panel from a lower spec NC and installed the illuminated switches for this unit and the intercom.

    As the switch is illuminated I ran a power feed off an auxiliary fuse box to the switch and ran an earth to an earthing point under the centre console.

    So there it is, I now have an additional brake light repeater and when required I can run a flashing rain light on track days.

    Another option would have been to rig the rain light so that the flashing function requires the headlights and rear lights to be on. I’ll think about it but and the implications for the future.

    First Impressions

    It was easy to instal, it’s bright and it works. I like it.

    Ironically there’s a yellow warning for heat out at the moment and no rain forecast for some time. Probably just in time for when I return to Thruxton next month.

  • Wet One at Silverstone Track Day

    Wet One at Silverstone Track Day

    Last June (2025), Silverstone was hot and sunny, we took a support car loaded with tools, tyres, gazebo and picnic table; and iit was glorious.

    This year the June track day was cold, breezy and rainy, though to be fair it settled down after 14.00 and the sun made an appearance, but what ever the weather a track day at Silverstone is such fun.

    It’s an expensive venue so it’s a once a year treat for me. This year the weather forecast was bad enough for me to cancel the support car because sitting in a car for much of the day gazing at the rain and being bored while I was out on track having fun was not something I wanted to inflict on anyone.

    Tyre Choice

    My Yokohama AD08’s were swapped for my SportMax road tyres in the rain the day before as they’d be no use in the expected heavy thundery rain.

    An early morning start on the motorway saw mixed conditions and I stopped at the services on the A43 at Brackley and took the opportunity to top up the petrol can with Super Unleaded and then a short final leg to the track and registration at the old pit lane.

    Setting Up

    The rest of the pit area
    My Pit

    I arrived at the track at about 7.30 and the gate and parked near the Cafe. I registered and got all the info want back to my car and pulled all the gear I’d crammed into it out.

    Two tool boxes, torque wrench, and a dry box for my food and drinks. I pulled my tow bar out of the boot and packed by helmet and HANS bags into the waterproof box.

    I placed the gear in front of the car so my Pit Box was clear to anyone who might be tempted to block it when I’m out on track. This has happened to me before at Castle Combe and is particularly irritating especially when your gear is in full view of them. I now reverse park and go no further back than the line for this reason.

    The Paddock
    The Padock, Drive up to the big truck and turn left into the pit lane.

    Some cars pulled in beside me and they arranged their cars specifically for this reason, telling me they have had similar experiences.

    Car Prepration

    Having experienced a bit of torque twitchiness on the motorway I backed the rebound on the suspension to +5 (five clicks from softest) with a plan to adjust as I went along and then also reduced tyre pressures to 1.8 bar (cold-ish)all round ready for the rain.

    suspension adjustment made easy with extenders all round
    Dial to max soft then +5 clicks

    Once round all the wheel nuts with a torque to check they were all firmly at 100nm and I was ready for the briefing and sighting laps.

    Briefing

    The Briefing was well attended with an explanation of the format of the day, the flags in use, when we stop for lunch, rules for overtaking, then it was back to the car to kill time until the sighting laps.

    Game On

    A wet track

    The sighting laps started at the usual pace and speeded up. After that the track opens and we’re on our own.

    Silverstone in the rain paddock side is bleak, track side however is much more entertaining.

    I followed the usual pattern of trying to get some heat into the brakes and tyres and building up speed as the laps tick by. I managed to get between 80 and 90 mph down the Hamilton straight, 90 to 106 down Hanger and 80 to 100 depending on the intensity of the rain and whether I was giving way to faster cars or not. Never once did the car feel like it was aquaplaning on the straights or braking in straight lines.

    Turning however was another matter several times I underbaked and the Traction control pulled it all back together.Appart from the trying the tarmac run-off between ?? Maggotts and Becketts, and going all wheels over the line at The Loop which is very slow and for which the car was off line due to the traction control being unhappy that I was pushing the cornering forces much harder.

    Given the weather I elected to put in more laps each time I was out (uptown blocks of 10 laps) and this help build a better picture of the conditions and the available grip.

    There were some really nice episodes where I had an open track to play with. On others I was forced to pull over on the right side of the track to let faster cars past. In the rain this can create a worry effect where there is vision at the sides of the track but a grey hole in your vision where you know the cars should be but you can see nothing but grey water as they speed past you (especially at the end of the Hanger straight).

    After the lunch break things began to dry out and I was able to get the roof down on occasion.

    Thoughts on the Day

    Despite the weather I found nothing to put me off Silverstone in the rain though I prefer the dry conditions for grip.

    I used the petrol pumps at the circuit rather than drive to Brackley on this occasion as I was shocked to find at the lunch break to find I had been racking up the laps and was down to less than a quarter of a tank. MPG for the car had dropped from 37 to 22 with enthusiastic driving on the track and across he whole day (including travelling to and from the circuit) I used nearly two tanks of Super Unleaded.

    In the wet conditions the tyres remained pretty intact with none of the heavy wear and melted rubber from the previous year evident.

    The brakes (EBC Yellow Stuff on normal discs) were again superb.

    The new suspension was excellent and I ended up settling at +7 clicks.

    Given the rain and some visibility issues Ive decided to buy a flashing rain light as a safety measure for similar conditions.

    Hopefully I’ll be back next year.

  • MX5 Suspension & Exhaust Upgrades Begin

    MX5 Suspension & Exhaust Upgrades Begin

    Introduction

    May and June saw the process of preparing the car gathering pace ahead of planned trips to Silverstone and Thruxton circuits.

    Planned works included BC Racing DS coilovers in the corners, a sound-pipe delete and a new catted BBR GTI Exhaust System. Also plans included installation of adjustable seat runners on the passenger side and new EBC yellow stuff pads for the season ahead.

    BC Racing Coilovers

    Choosing the suspension has been the most stressful decision about the car so far. I wasn’t sure I even needed to upgrade and it was pretty good already with the Bilsteins which were standard on this spec of car.

    The choices I thought about were – should I stay with the Bilsteins’ or try something else; and if something else then what; should I run with the pack and fit Meisters or try something else like Yellow Speed Racing, Ohlins, or similar.

    At Thruxton I’d hit the bump stops at Campbell on more than one occasion last year when trying to conserve speed so this had made up my mind to try something new. I was looking for something firmer, and with 88k on the clock I thought the Bilsteins’ were probably past their peak.

    In the end, after much humming and harring I chose the BC Racing DS range as I wanted something that might be more plush for the road bumps and stiffer for the track day undulations. I elected to stay with the softer 6Kg/mm front 4 Kg/mm rear springs as BC racing had strongly suggested this starting point so I elected to run with it and upgrading springs if necessary in the future would not be that expensive.

    Installation

    I measured the ride height of the car (hub centre to top of wheel arch) prior to starting and decided that my target would be 245mm for the front and 250mm for the rear once the new suspension was installed.. This would give a little rake for loading and acceleration squat and I gambled that the stiffer springs would not squat so much with fuel and passengers on board, It will be easy to adjust the height once the car had settled onto its new suspension should this not be enough.

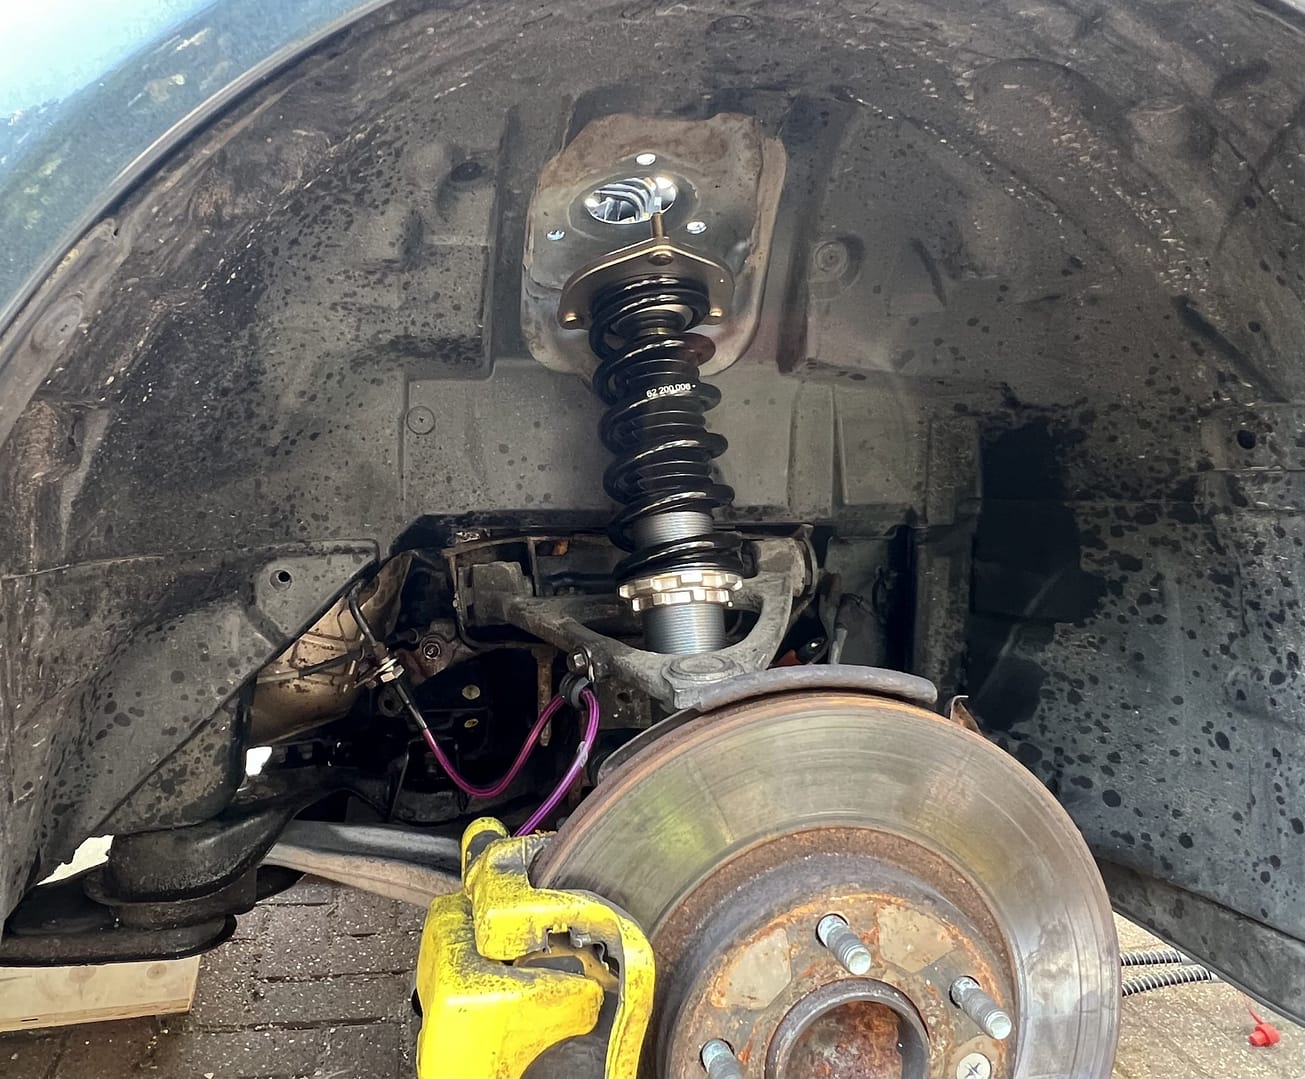
    I having jacked up the car. I removed the wheels then the bolts on the suspension upper mounts and also removed the turret brace bars. These bolts are not torqued up very much and were easy to remove.

    The front left was the first to succumb to change and took me a little longer than I had anticipated. I ended up accidentally disassembling the whole original shocker on the car having misunderstood what I was looking at when I was looking down at the top mount as the top of the Bilstein mount which had a black shiny metal cap was nearly the same colour as my car and looked like a permanent part of the car. having understood the issue the remaining mounts proved much easier to remove.

    I also removed suspension upper wish bone bolts, brake line fasteners, anti-roll bar and drop-links to allow for the necessary wiggle room and it all came out nicely. The only pig was the strut bottom nut and bolt which was super stiff and took plenty of work with a breaker bar to get out.

    To be fair the new struts are pretty boring to look at but are super clean and have no rust (unlike my rusty Bilsteins which had definitely seen better days).

    When refitting the top suspension mount brace to the BC’s I took the opportunity to drill the brace top and fit 11cm extenders to the front suspension adjusters and 25cm extenders to the rear. these facilitate rapid adjustment of rebound on track days. I wound it all up to 5 clicks off max hardness all round for the test period

    The sound pipe has been deleted and a Mk3.1 air pipe replaced the original. Also the suspension adjustment is blocked by strut brace
    Sound Pipe Delete and new suspension fitted

    New Exhaust System

    Whilst the car was up on the jacks I took the opportunity to instal a new exhaust. This was a the BBR GTI catted manifold, mid section and Grand Touring exhaust. Removing the old manifold was the most trickiest operation with rusted in bolts catching on the body work despite angling the engine over on one side as seen in the Turbo installation YouTube video from Flying Miata.

    The purchase of some swan neck ring spanners proved very useful in both the removal and installation phases for managing the manifold bolts.

    I also gave some thought to he absence of heat shields on the BBR manifold and fitted some gold reflective tape to the pipes and cam cover and existing engine bay shield and fabricated a shield for the back of the alternator where there appears to be a black plastic air duct.

    Heat shielding over new exhaust, also suspension adjustment extenders fix the problem of fouling caused by strut brace.
    Heat shielding and suspension adjustment extenders.

    Versatune

    Also while I was at it I opted to remap the ECU by flashing it with a vesatune basic upgrade.

    Impression

    So the weird thing is that the suspension feels a little stiffer but not massively different at urban speeds. The engine note is exactly what I wanted with a little burble and more open bark under acceleration and is not any more intrusive at motorway speeds than OEM.

    I had dialled the suspension up to five clicks from hardest all round and have noticed that under hard acceleration there is now some kick in the straight line direction upon gear change and I think this may be because as yet I have not had the tracking re-set. though it may also be chasis flex, but tracking will be the first step.

    Anyway despite this anomaly it was more or less ready for Silvestone and Thruxton and the seat runners would have to wait for another day…..

Optimized by Optimole